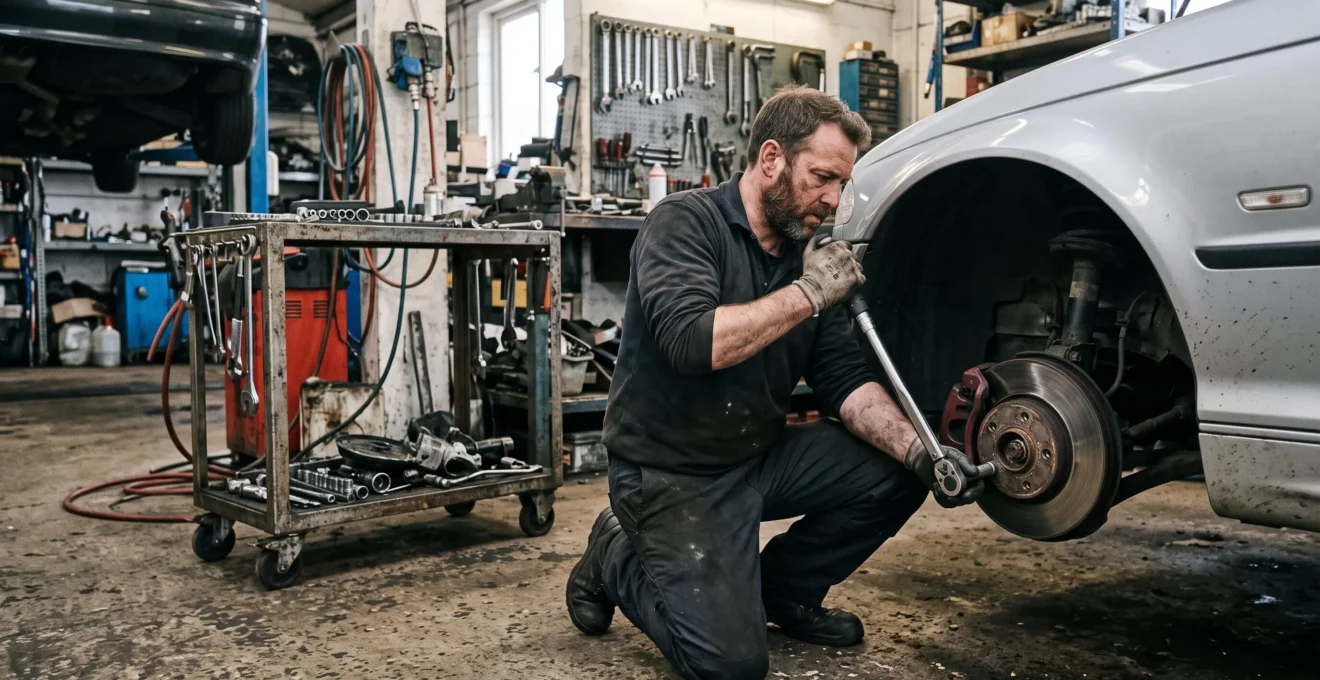
Replacing a worn car component should restore reliable operation, not start another cycle of unexpected repairs. Yet even a correctly specified replacement can fail early if installation conditions, neighbouring components or everyday driving stresses are overlooked.
Extending car component durability begins with understanding why parts wear out. A brake pad affected by a sticking caliper, a new tyre damaged by poor wheel alignment or a suspension component exposed to repeated impacts may deteriorate long before its expected service interval. Replacing the affected part alone does not necessarily correct the underlying problem.
The most cost-effective approach combines accurate diagnosis, careful installation, protection against environmental damage and maintenance based on actual condition. It also means knowing when continued use becomes more expensive or dangerous than preventive replacement.
These principles apply broadly to passenger vehicles in English-speaking markets, although manufacturer specifications, inspection requirements and local road conditions must always take precedence.
How to make replacement car parts last longer
- Identify the cause of wear before replacing a component. Incorrect installation, unsuitable specifications and neighbouring mechanical faults can shorten the life of new parts.
- Protect components against their main deterioration mechanisms, including corrosion, excessive loading, contamination and rubber ageing.
- Use condition-based inspections alongside manufacturer maintenance schedules, replacing safety-critical components before their failure becomes dangerous.
- Why Do Newly Installed Car Parts Wear Out Earlier Than Expected?
- How to Avoid Installation Damage When Fitting Replacement Components?
- Metal, Rubber or Composite Parts: Which Materials Resist Wear Better?
- How Road Salt and Moisture Shorten the Life of Underbody Components
- When Repeated Part Failures Call for a Wider Mechanical Inspection
- When Should Ageing Components Be Replaced Before They Fail?
- Why Do Potholes and Gravel Roads Wear Out Components Faster?
- How to Build a Regular Car Maintenance Routine That Prevents Breakdowns
Why Do Newly Installed Car Parts Wear Out Earlier Than Expected?
Newly installed car parts can wear out prematurely because the component is defective or unsuitable, the installation is incorrect, or operating conditions exceed what the part can reasonably withstand. A surrounding mechanical fault may also accelerate deterioration. Identifying the actual cause is essential because replacing the same component without correcting that cause can produce another failure.
Premature wear generally involves three categories of contributing factors:
- Component problems: manufacturing defects, counterfeit products, inadequate material quality or a replacement that does not meet the vehicle’s specifications.
- Installation problems: incorrect tightening torque, contaminated mounting surfaces, incompatible hardware or a component fitted in the wrong position.
- Operating conditions: repeated impacts, corrosive exposure, unusually heavy loads, excessive heat or an unresolved fault elsewhere in the vehicle.
New brake pads provide a useful example. Their friction surfaces require a bedding-in process to establish appropriate contact with the brake discs. Aggressive braking during this period can contribute to glazing, which can reduce braking performance. The manufacturer’s bedding-in instructions should therefore be followed, without compromising safe braking when required.
Ferodo‘s brake pad troubleshooting reference identifies contamination, incorrect fitting, irregular disc condition and sticking caliper components among possible causes of abnormal pad deterioration. These observations demonstrate why apparently defective pads sometimes require inspection of the complete braking assembly.
Not every replacement component needs the same running-in treatment. Brake friction materials have specific bedding requirements, while seals and bearings depend primarily on correct preparation, lubrication where specified and installation procedures. A universal gentle-driving period cannot compensate for incorrect assembly.
Part traceability provides another safeguard. Before installation, compare the manufacturer and supplier part numbers, OEM references where applicable, packaging identification and any relevant approval markings. A replacement described as compatible may still differ in dimensions, load rating, material properties or required specifications. Certification marks should be checked for relevance to the actual product and market rather than treated as a universal guarantee of quality.
Finally, inspect interacting components. A worn shock absorber, for example, may contribute to irregular tyre wear even after new tyres have been fitted. The immediate failure and its underlying mechanical cause are not always the same.
Once the correct component and underlying cause have been identified, the next priority is ensuring the installation itself does not introduce a new weakness.
How to Avoid Installation Damage When Fitting Replacement Components?
Installation damage is best prevented through a three-stage process: verify the replacement before fitting, follow the exact manufacturer procedure during assembly, and perform the required checks afterwards. Clean contact surfaces, correct fasteners, specified tightening torque and suitable functional testing matter more than installation speed. Safety-critical work should be entrusted to a qualified technician when the required expertise or equipment is unavailable.
A dependable installation begins before the old component is removed. Confirm the replacement reference against the vehicle’s exact model, engine or drivetrain configuration and relevant production details. Inspect the part for shipping damage and check whether the procedure requires replacement bolts, seals, clips or other single-use hardware.
During assembly, small errors can have expensive consequences:
- Incorrect tightening: excessive or insufficient clamping force can damage sensitive assemblies or allow movement, depending on the component.
- Contaminated surfaces: rust, dust or oil can interfere with proper seating and friction performance.
- Unsuitable lubrication: omitting specified lubricant can encourage sticking, while applying grease or anti-seize where prohibited can affect friction or fastener performance.
- Reused single-use parts: certain fasteners and seals cannot reliably perform their intended function after removal.
For disc brake servicing, HELLA‘s brake replacement technical instructions emphasise removing corrosion from hub contact surfaces, keeping friction surfaces free of contamination and respecting specified tightening torques. The documentation also includes inspection and functional checks after assembly.
Some replacements require associated procedures. Brake pads or shock absorbers may need replacement in axle pairs to maintain balanced performance, depending on the condition and manufacturer instructions. Brake work may require bleeding, electronic parking brake service procedures or diagnostic resets; suspension work may require a wheel alignment check. These operations are not universally required for every vehicle.
The appropriate DIY decision depends on the consequences of an error, not merely the apparent simplicity of the component.
| Installation category | DIY suitability | Recommended approach |
|---|---|---|
| Low-risk accessible components | Often suitable with clear instructions | Follow the vehicle manual and verify operation |
| Components requiring precise torque or special tools | Depends on equipment and competence | Use a qualified technician if specifications cannot be met |
| Brakes, steering and other safety-critical assemblies | High consequences if performed incorrectly | Professional installation and appropriate testing are advisable |
| Systems requiring calibration or electronic initialization | Limited without compatible diagnostic equipment | Arrange the specified workshop procedure |
After fitting, confirm the component operates normally, inspect for leaks or unusual movement where applicable, and complete any prescribed tests. A short road test cannot replace specialised testing when the repair procedure requires it.
Correct assembly protects a replacement from immediate mechanical damage, but its long-term durability also depends on the properties of the material from which it is made.
Metal, Rubber or Composite Parts: Which Materials Resist Wear Better?
No automotive material resists every type of wear better than the others. Metals can withstand substantial mechanical loads and heat but may corrode or fatigue. Rubber absorbs vibration and accommodates movement but deteriorates through ageing and chemical exposure. Composites resist certain environmental stresses yet can develop cracking or internal damage. The right material depends on the component’s function and operating environment.
The first distinction is between different deterioration mechanisms. Abrasion removes material through repeated contact; fatigue develops under cyclic loading; corrosion chemically or electrochemically attacks susceptible materials; and environmental ageing changes the properties of polymers over time.
These mechanisms explain why two versions of the same component may perform differently in different climates.
| Material | Main advantages | Typical limitations | Inspection priorities |
|---|---|---|---|
| Steel and other ferrous metals | Strength, stiffness and established repair applications | Rust, fatigue and coating damage | Corrosion, cracks, deformation and looseness |
| Aluminium alloys | Lower weight and useful structural properties | Corrosion in susceptible environments, fatigue and possible galvanic interactions | Damage near joints, fasteners and loaded sections |
| Rubber and elastomers | Flexibility, sealing and vibration isolation | Oxidation, heat, ozone, fluid exposure and hardening | Cracking, swelling, leaks and loss of flexibility |
| Polymer composites | Low weight and resistance to some forms of corrosion | Potential cracking, delamination and temperature-dependent degradation | Impact damage, deformation and hidden structural deterioration |
Rubber deserves particular attention because calendar age and mileage describe different risks. A vehicle that travels very little can still develop ageing seals, brittle hoses or degraded bushings. Heat, ozone, oxidation and exposure to incompatible fluids may change elasticity even when the component has experienced limited mechanical wear.
Manufacturing and storage history can therefore matter when purchasing rubber-based replacements. Check available date markings, supplier guidance and storage conditions, particularly for products with specified shelf-life requirements. Not every automotive rubber component carries a standardized manufacturing date or has the same age-related replacement limit.
For example, steel and aluminium suspension arms should be compared using the vehicle’s approved design, expected loading and corrosion conditions rather than assuming one metal is universally superior. Similarly, silicone and conventional rubber hoses are not automatically interchangeable: pressure ratings, fluid compatibility, temperature range and fitting design must match the application.
Inspection methods should also reflect the material. Visible rust may indicate a problem on a steel component, but corrosion severity cannot always be judged from the surface. Composite deterioration or internal rubber damage may likewise remain hidden despite an acceptable external appearance.
When damage cannot be reliably assessed visually, the manufacturer’s inspection criteria or professional evaluation should determine whether continued use is appropriate.
Material selection becomes especially important where moisture and de-icing chemicals expose several different components to corrosion at the same time.
How Road Salt and Moisture Shorten the Life of Underbody Components
Road salt accelerates underbody deterioration by helping moisture form a conductive film on exposed surfaces, increasing the conditions under which corrosion can occur. Salt deposits can remain in joints, cavities and wheel arches after roads have dried. This means corrosion risk may continue beyond the winter driving season, particularly where residues are trapped against metal components.
Salt contamination is particularly damaging where protective coatings have been scratched or where dirt retains moisture. Chloride-containing deposits can interfere with protective surface films, allowing localized corrosion to develop.
Galvanic corrosion adds another concern when dissimilar metals are electrically connected and exposed to a conductive electrolyte. Not every combination of metals produces severe damage, but susceptible joints and fasteners deserve attention.
Moisture can accumulate in overlapping panels, suspension mounting areas and enclosed sections that are difficult to inspect from outside. These hidden areas may remain damp even when the visible vehicle underside appears clean.
Protection begins with removing deposits before they remain trapped for extended periods. In AAA‘s warning about winter road salt damage, published on February 18, 2026, the organization recommends regular underbody washing, including at least every two weeks during relevant winter conditions and additional cleaning after heavily salted-road exposure.
That interval is practical guidance rather than a universal optimum. Drivers exposed to frequent salting may need more frequent cleaning, while vehicles operated in milder conditions may require a different approach.
During washing, pay particular attention to wheel arches, accessible underbody surfaces, suspension mounting areas and places where dirt accumulates. Avoid directing forceful water jets into sensitive electrical connectors, seals or protected openings. Hidden cavities and internal reinforcements may require appropriate workshop inspection and treatment rather than aggressive DIY spraying.
Protective coatings also differ in how they work:
- Wax-based treatments: create a protective barrier and are commonly used on suitable underbody surfaces and cavities.
- Fluid oil-based inhibitors: can penetrate some joints and crevices but may require periodic inspection or renewal.
- Rigid underbody coatings: provide a physical barrier when correctly applied, but damaged or poorly applied coatings can conceal corrosion and trap moisture.
Coating preparation is critical. Significant existing corrosion, trapped moisture and loose coatings should be addressed before treatment. Products must be compatible with the surfaces involved, and areas such as brakes, exhaust components, sensors and manufacturer-designated drainage openings must not be indiscriminately coated.
Salt-related deterioration extends beyond structural metals. Brake lines, electrical connectors, wiring terminals and fasteners can also suffer damage. Corroded fasteners may seize, increasing labour requirements during future repairs, while damaged brake pipes or electrical connections can introduce direct safety and reliability risks.
If corrosion-related repairs keep recurring despite cleaning and protection, the vehicle may need a broader inspection to identify damage that remains outside the immediately affected area.
When Repeated Part Failures Call for a Wider Mechanical Inspection
Repeated failure of the same car component should trigger a wider mechanical inspection when ordinary wear, incorrect fitment or an isolated manufacturing defect no longer explains the pattern. If a replacement fails again unusually quickly, the next repair should examine connected components, alignment, operating loads and installation conditions. Another identical replacement may only conceal the problem temporarily.
A practical warning threshold is two unexpectedly early failures of the same component within a short period. This is a diagnostic rule of thumb, not a statistically validated failure threshold. A single unusual failure can also justify immediate investigation when safety-critical systems are involved.
The underlying cause may be mechanical, electrical, thermal or environmental. A part can be damaged by forces or operating conditions generated elsewhere in the system.
Consider these diagnostic connections:
| Recurring symptom | Possible contributing factors | Wider inspection |
|---|---|---|
| Uneven tyre wear | Incorrect alignment, suspension wear or pressure problems | Wheel alignment, joints, dampers and inflation history |
| Premature wheel bearing failure | Incorrect mounting preload or torque, damaged mounting components or impact loads | Hub, knuckle, associated joints and installation procedure |
| Repeated belt damage or loss of tension | Worn tensioner, misaligned pulleys or defective driven accessories | Pulley alignment, bearings and tensioning system |
| Recurring seal leaks | Damaged sealing surfaces, shaft movement, pressure issues or incorrect installation | Mating surfaces, ventilation or pressure control and related bearings |
| Rapid brake pad wear | Sticking caliper, guide problems or irregular disc contact | Caliper operation, guide pins, discs and hydraulic components |
These are possible diagnostic directions, not proof of a particular cause. A workshop should verify the fault through appropriate measurements and inspections before authorising further repairs.
Maintenance records are especially useful when a failure is intermittent. Record each replaced component’s description, brand, part number, installation date, odometer reading and reason for replacement. Keep invoices, inspection results and any available photographs of abnormal wear.
Such records help establish whether failures cluster around a particular component, operating condition or repair. They may also support a warranty enquiry, although coverage depends on the applicable terms and jurisdiction. A defective product and damage caused by an unrelated vehicle fault may be treated differently.
Ignoring a recurring problem can allow a failure chain to develop. An unresolved cooling-system defect, for instance, may contribute to overheating that damages other engine components. Electrical supply or charging faults can likewise produce symptoms across several connected systems.
A broader inspection costs money, but repeated isolated repairs can become more expensive when the underlying problem continues damaging new components.
Once the vehicle is operating correctly, the remaining challenge is deciding which ageing components still have useful service life and which should be replaced proactively.
When Should Ageing Components Be Replaced Before They Fail?
Ageing car components should be replaced before failure when their condition, specified service life or potential failure consequences make continued use unacceptable. The correct decision depends on whether deterioration can be measured and monitored or whether failure may occur suddenly. Timing belts, tyres, brake components and suspension parts therefore require different replacement strategies.
The distinction between time-based replacement and condition-based replacement is central to avoiding unnecessary expense.
Some components have manufacturer-specified limits based on elapsed time, distance or both. Timing belts are a familiar example: their replacement must follow the applicable vehicle and engine schedule, even when no external defect is obvious. A belt failure on certain engine designs can cause extensive internal damage.
Other components provide measurable signs of wear. Brake pad thickness, brake disc dimensions and tyre tread depth can be inspected against the relevant limits. Shock absorbers and suspension assemblies require assessment of performance, leaks, looseness and physical condition; mileage alone is not a sufficient diagnosis.
Owners can watch for practical warning signs:
- Cracks, swelling, leaks or other visible deterioration in accessible rubber components.
- Unusual movement or looseness in a joint, assessed using the correct inspection method.
- Persistent vibration, new mechanical noise or changes in steering behaviour.
- Changes in braking performance, including pulling or unexpected increases in stopping distance.
- Irregular tyre wear or deterioration occurring faster than previous inspection records suggest.
These symptoms do not identify a specific failed component by themselves. Changes affecting braking, steering, wheel security or tyre integrity require prompt professional evaluation rather than waiting for the next routine service.
Age can matter even when mileage is low. The US National Highway Traffic Safety Administration notes in its tyre safety guidance that storage, environmental exposure and ageing affect tyre condition. It also explains that some tyre and vehicle manufacturers recommend replacement after six to ten years regardless of remaining tread. That range is not a universal legal deadline and should not replace the applicable manufacturer’s guidance.
The broader principle is that an older, lightly used vehicle may still need age-related maintenance. However, tyre ageing recommendations should not be transferred automatically to brake hoses, bushings, seals or belts, which follow their own inspection and replacement requirements.
A useful preventive replacement decision combines three questions: How likely is a significant failure under current conditions? What could that failure damage? What would happen if it occurred while driving?
For example, a worn component that could damage a costly neighbouring assembly may justify earlier intervention than a cosmetic part whose deterioration has little functional consequence. Conversely, replacing a healthy, easily monitored component substantially ahead of its specified limit may offer little practical benefit.
Salt exposure, heavy towing, frequent short trips, extreme temperatures and prolonged outdoor storage can change the relevant risks. These conditions justify more attentive inspections and adherence to any applicable severe-service schedule, not arbitrary reductions in all replacement intervals.
Driving conditions can accelerate that risk, especially when the vehicle regularly encounters road impacts and abrasive surfaces that standard maintenance assumptions may not fully reflect.
Why Do Potholes and Gravel Roads Wear Out Components Faster?
Potholes and gravel roads accelerate wear through different physical mechanisms. Potholes produce sudden impact loads that can damage tyres, wheels and suspension components or disturb alignment. Gravel roads generate repeated vibration, dust exposure and abrasive contact with exposed surfaces. Both can gradually reduce component life, even when the vehicle initially appears to drive normally.
When a wheel enters or strikes the edge of a pothole, the suspension must absorb a rapid change in vertical loading. The impact can transmit forces through the tyre, wheel, hub, bearings and suspension joints. A severe impact may produce immediate damage, while repeated smaller loads can contribute to cumulative wear.
Wheel alignment can also be affected by an impact or by damage to suspension components. The resulting change in tyre contact and loading may cause uneven tread wear long after the original event.
Gravel roads create a different wear pattern. Loose stones can chip protective paint, damage exposed surfaces and strike underbody components. Dust can increase contamination around vulnerable systems, including air filtration equipment, depending on vehicle design and operating conditions.
Preventive driving habits should reflect these differences:
- Reduce speed before damaged road sections: this generally lowers impact severity and gives more time to select a safe path.
- Avoid unnecessary harsh braking at the impact: sudden braking can alter suspension loading, although braking remains essential whenever needed for safety.
- Maintain the specified cold tyre pressure: underinflation increases tyre deformation and heat, while inappropriate overinflation can compromise ride and contact characteristics.
- Increase inspection attention on gravel roads: check for damaged protective surfaces, lodged debris and unusual contamination.
Tyre pressure should not be deliberately adjusted away from the vehicle manufacturer’s specified operating recommendations simply to soften pothole impacts. Where a manufacturer provides different pressure settings for particular loads or operating conditions, use the applicable setting.
After a notable pothole strike, inspect the tyre and wheel for visible damage once the vehicle can be stopped safely. A bulge, cut, rapid pressure loss or visibly distorted wheel requires prompt attention. Do not continue driving on a tyre suspected of having dangerous structural damage.
Over the following journeys, watch for persistent steering pull, vibration, new wheel-area noises or developing irregular tyre wear. These symptoms warrant professional inspection of tyre integrity, wheel condition, suspension and alignment. Some internal tyre damage cannot be ruled out by visual inspection alone.
Slower progression on damaged roads and timely post-impact checks can prevent an initially limited problem from accelerating wear elsewhere in the vehicle.
The most effective way to make those checks consistent is to integrate them into a maintenance routine that adapts to the vehicle’s actual use.
Key takeaways before building your maintenance routine
- Inspection frequency should reflect the vehicle’s exposure to salt, impacts, heat and demanding operation rather than calendar dates alone.
- Changes between inspections are often more informative than one isolated measurement, particularly when identifying unusually rapid wear.
- Safety-critical and potentially cascading failures should receive budget priority over cosmetic or low-consequence deterioration.
How to Build a Regular Car Maintenance Routine That Prevents Breakdowns
A useful car maintenance routine combines quick weekly observations, more detailed monthly checks and periodic professional inspections based on manufacturer schedules and driving conditions. It should track component condition over time rather than rely on mileage alone. By recording changes and prioritising higher-risk problems, owners can reduce unexpected failures without replacing healthy parts unnecessarily.
Effective maintenance works at three levels, each with a different purpose.
| Frequency | Checks to prioritise | Purpose |
|---|---|---|
| Weekly quick observation | Visible tyre condition, accessible fluid indicators, new leaks and unusual driving noises | Identify emerging warning signs early |
| Monthly detailed check | Cold tyre pressures, tread condition, lights, wipers and accessible components | Detect measurable wear and developing defects |
| Scheduled and seasonal inspection | Manufacturer service items, brakes, suspension, underbody corrosion and condition trends | Address age-related risks and operating-condition damage |
These intervals supplement the vehicle’s specified service schedule rather than replace it. Some components require checks more frequently under particular conditions, while others should only be inspected or serviced using appropriate workshop equipment.
Monthly tyre pressure checks are particularly valuable. The NHTSA recommends checking tyres when cold, using the vehicle’s specified inflation pressure rather than the maximum pressure marked on the tyre. Its guidance defines cold tyres for this purpose as tyres not driven on for at least three hours. Tyre identification, tread and age-related recommendations should be checked against the requirements applicable in the country where the vehicle is operated.
A routine should also change with vehicle use. Frequent short journeys can make certain manufacturer-defined severe-service requirements relevant. Heavy towing increases loading and may require specific service intervals. Salt exposure makes underbody inspection more important, while regular gravel driving increases attention to tyre damage, dust and protective surface deterioration.
Instead of replacing components at arbitrary intervals, compare their condition between inspections. A brake pad measurement becomes more useful when its previous thickness and the distance driven since that measurement are known. Likewise, tyre tread readings can help identify unusually uneven or rapid wear.
Measurements must be taken consistently and interpreted against the correct specifications. A rapid change may indicate a mechanical problem, but it does not establish a diagnosis without further assessment.
Five actions for a practical component durability routine
- Identify the vehicle’s official maintenance requirements and record the next scheduled service items in a maintenance calendar.
- Check cold tyre pressures and visible tyre condition, recording the pressure readings and any observed defects.
- Review recent repairs and create a component history containing part identification, replacement dates, odometer readings and invoices.
- Record recurring symptoms and inspection measurements, producing a short list of components needing professional assessment.
- Rank outstanding work by safety risk, potential secondary damage and urgency, then create a prioritised repair plan with the workshop.
Budget planning should separate immediate safety concerns from components that can be monitored. Braking defects, dangerous tyre damage and critical steering or suspension problems take priority. Problems that could trigger major secondary damage should also be addressed promptly, while cosmetic repairs and minor comfort issues can generally be planned with greater flexibility.
For owners managing maintenance expenses, a written history makes decisions less reactive. It helps distinguish normal deterioration from unexpected wear and provides useful evidence when requesting a diagnosis or discussing repair options.
Start with the next monthly tyre and visual inspection, record the findings, and review the vehicle’s upcoming manufacturer-specified service items. If a component has failed unusually early or a safety-related symptom is already present, arrange a proper diagnosis before purchasing another replacement. The aim is not to postpone every repair, but to make each replacement necessary, correctly performed and less likely to be repeated.
Can better maintenance make aftermarket car parts last as long as original parts?
Correct maintenance and installation can help suitable aftermarket parts achieve their intended service life, but longevity cannot be guaranteed to match an original component. Material quality, engineering specifications, manufacturing consistency and operating conditions all matter. Choose replacements that meet the vehicle’s requirements and investigate any abnormal wear rather than assuming all aftermarket parts perform identically.
Does washing the engine bay help replacement components last longer?
Removing excessive dirt can make leaks and damage easier to identify, but engine-bay washing is not automatically beneficial for every component. Incorrect cleaning methods can introduce water into sensitive electrical systems or damage connectors and seals. Follow vehicle-specific cleaning instructions, avoid inappropriate chemicals and do not direct high-pressure water at vulnerable components.
Should a car component be replaced because its warranty is about to expire?
Warranty expiry alone is not evidence that a component has reached the end of its service life. Replacement should depend on its actual condition, manufacturer requirements and failure consequences. If abnormal symptoms appear before the warranty expires, document them and seek assessment under the applicable warranty terms rather than waiting for complete failure.
Can a vehicle with low mileage still suffer premature component deterioration?
Yes. Rubber ageing, corrosion, environmental exposure and prolonged storage can affect components independently of distance travelled. A low-mileage vehicle may therefore need tyres, seals, belts or other age-sensitive components assessed according to their particular specifications and condition. Low mileage should not be used as the sole reason to postpone time-based maintenance.
Is it worth replacing several nearby components during one repair?
Sometimes. Combined replacement can be sensible when the manufacturer requires it, when components must be serviced together for balanced operation, or when inspection reveals related deterioration. Shared labour may also affect the economic decision. However, replacing every accessible component without evidence of need can waste money. Ask the technician to distinguish required associated work from optional preventive replacement.